Welcome new Android user! So, you’ve gotten past initial setup and your shiny new phone is activated. Perhaps, you’re asking what’s next? This article is meant for you!
Gestures and Haptic Feedback
Certain actions are referenced in this guide, therefore it would probably help to mention what is meant by them.
- Swipe = Moving one’s finger across the screen
- Tap or touch = A short tap or touch then release on something (for example an app)
- Long Press = A tap and hold Drag and drop = Tapping something, then swiping without releasing until at the location you wish to place it
Additionally, there is the concept of haptic feedback. Haptic feedback is a vibration you’ll feel when executing some of the above. It’s your phone’s way of letting you know it recognizes an action. Common examples are the vibrations felt when executing a long press and typing on the keyboard.
Though not gestures per se, it may help to know how to power your phone down as opposed to merely putting it to sleep. It’s all about the power button. Pressing and releasing the power button puts your phone to sleep. For the most part, this is sufficient. If, however, you have need to completely power down your phone, press and hold the power button until you feel a vibration (haptic feedback). On the screen, tap Power off. Depending on manufacturer, phone model and Android version, you may see an option to Restart and other options as well.
The Lock Screen
If you enabled a screen lock when setting up your phone (and to protect the security of your personal information hopefully you did), the first thing you’ll see is a screen lock asking for a PIN, password, pattern and depending on phone model possibly so-called biometric information (fingerprint or facial recognition). Here’s what to do to unlock your phone:
- Swipe the screen up from the bottom.
- Enter your PIN, pattern or password depending upon which you chose during phone setup.
- If you used a PIN be sure to tap the
 or OK under the number nine.
 - If you used a password, tap the or Done.
The above actions work across all versions of Android. Additionally, depending on phone model, you may have chosen to setup the use of fingerprint(s) or facial recognition.
Please note these biometric methods are not always fool proof, so Android insists that you set up one of the previously referenced methods as a backup. In the event, your fingerprint or face doesn’t unlock your phone, you’ll still be able to gain access using the backup method chosen during phone setup.
If you didn’t setup a screen lock during phone setup, I suggest you reconsider that. It may be the only thing standing between your personal information and someone who shouldn’t have it in the event your phone is lost or stolen. I’ll have more on how to setup a screen lock after the fact later in the article, so please read on.
The Home Screen
Once your phone is unlocked, you’ll see your phone’s home screen. Typically, you’ll see a time and/or weather widget, a Google search bar and the apps your phone’s manufacturer thinks are likely to be used most often. Home screens are customizable.
Widgets may be added as follows:
- Long press (tap and hold) a blank spot on the home screen.
- You’ll see options for adding widgets (and other options) at the bottom of the screen.
- Long press (tap and hold) a widget of interest and drag it to a spot on your home screen. If there is insufficient space on your home screen, additional home screens may be created by dragging and dropping a widget to the far right of the screen. An additional home screen will be created. You may switch between home screens by swiping left or right.
Likewise you may add additional apps to one of your home screens. To do so: Access the apps drawer. If you’re wondering what in tarnation is the apps drawer, stay tuned.
- Long press the app you wish.
- Drag and drop to the location desired on your home screen. As with widgets, dragging and dropping an app to the far right of your phone’s screen will create a new home screen.
- Alternatively, you may simply access additional apps via the apps drawer directly.
The Apps Drawer
- The apps drawer is Android speak for a list of apps on a phone. It’s accessed as follows:
- Swipe up from the bottom of your screen.
- There it is.
- Most manufacturers alphabetize the list by default making it easy to locate a specific app by browsing. If you have a Samsung phone, you need to first alphabetize the list. That’s done by tapping the three stacked dots upper right, tapping Sort, then tapping Alphabetical order.
- To launch an app, simply tap it.
Google’s Play Store
One app I wish to highlight is Google’s Play Store app. The Play Store is where one acquires additional apps not already installed on your phone. The Play Store is also how apps (both those that came preinstalled on your phone and those you choose to add) are kept updated. Keeping one’s apps updated is best practice. In particular, you’ll want to keep the Republic Wireless app updated to insure smooth operation of your Republic service.
Updating apps uses data, so it’s something best done when your phone is attached to a WiFi network to minimize the use of cell data you may be paying for and is better used for other purposes. To do so:
- Open the Play Store app (typically placed on your phone’s home screen by its manufacturer but also available from the apps drawer).
- Tap three stacked lines upper left.
- Tap Settings.
- Tap Auto-update apps.
- Tap Over Wi-Fi only.
Settings
If there’s something about your phone and it doesn’t involve an app or a widget, chances are it’s a setting. There are a variety of ways to access Android settings but the easiest is to swipe down from the top of your screen. One swipe down produces quick settings. These are the most commonly used Android settings. A second swipe down produces even more quick settings and more helpfully words identifying those quick settings.
If what you’re after isn’t in quick settings, look for a gear icon among the quick settings. Unfortunately, different manufacturers put it in slightly different locations. On Samsungs, it’s to the upper right. Most other manufacturers locate it to the lower right. Tapping that gear icon will launch Android’s full blown Settings app. Here you may browse for the setting you’re looking for, however, I suggest using search instead.
On Samsungs, there’s an easily identifiable search bar. For other manufacturers, there’s a magnifying glass icon to the upper right. A couple of sample settings searches follow:
Let’s say you didn’t select to enable a lock screen when initially setting up your phone. Here’s how to do so after the fact.
- Search for “screen lock”.
- A shortened list of settings will be presented.
- Tap Screen lock type or Screen lock.
- Select from an available method.
A second example is finding certain information regarding your phone:
- Search for “about phone”.
- Again, a shortened list will be presented.
- Tap About phone.
- You’ll be presented with some information regarding your phone.
Why might this information be helpful? Should you need to ask for assistance from the Community, we may need to ask for certain information. Specifically, we may need to know Model, Software Channel, Android version and Build number to best help you.
Status Bar and Notification Shades

![]()

The above graphics are snippets of the Android status bar from a Samsung phone, Google Pixel and Motorola phone respectively. In the Android status bar, you’ll typically find the following:
- WiFi (fan shaped icon): The fuller the fan, the stronger the signal of the WiFi network your phone is attached to.
- Cell (triangle icon): The fuller the triangle, the stronger the cellular signal of the cellular network your phone is attached to.
- Battery: A graphical (and sometimes numerical) representation of how much battery power is left.
- Clock: This one is self-explanatory.

You may also see other status icons, many of which are depicted below:
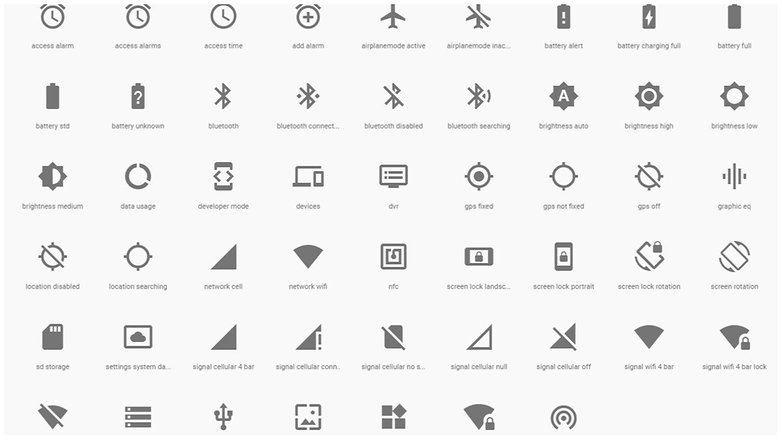
In many instances status bar icons have accompanying notifications housed in the notifications shade. If you remember quick settings, the notification shade is located directly below that and accessed by swiping down from the top of your phone. These notifications provide more context for their corresponding status bar icons. Generally, tapping an individual notification will launch the app or setting responsible for it.
I hope you found this guide to be helpful in getting acclimated to your new Android smartphone. If I’ve not addressed your question or concern, please fell free to leave a comment. the Community will do its best to help. We’re happy you’re here!